We may earn money or products from the companies mentioned in this post.
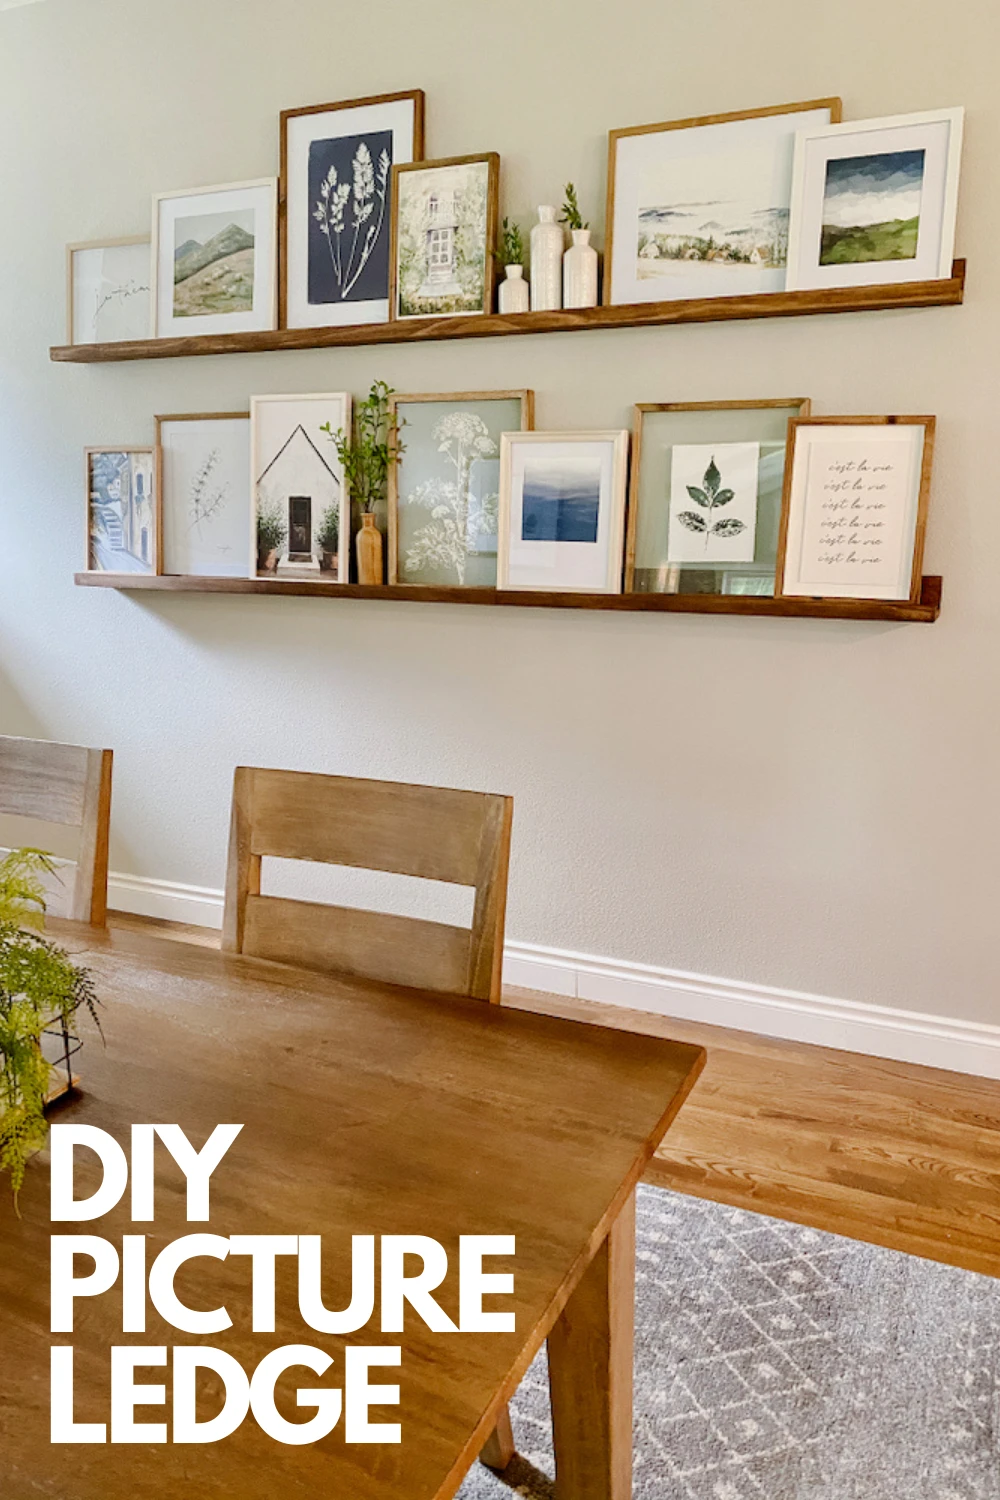
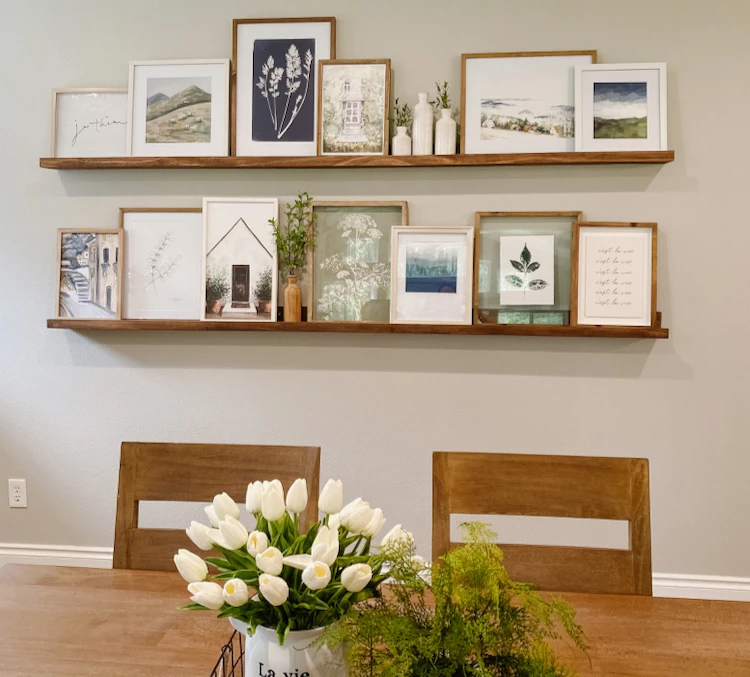
We have a very large wall in our kitchen dining area and I was hoping to add two long wood art ledges. I shopped around and I found that either the shelves were too short or just too expensive. I knew my husband and I could probably make what I was looking for at a fraction of the cost. And we did! I am so happy with how they turned out, how easy they were to make and how inexpensive they were to build. If you aren’t feeling very DIY, you can buy the Picture Ledges in various sizes and stains from Etsy. If you want to make your own, check out the instructions below!
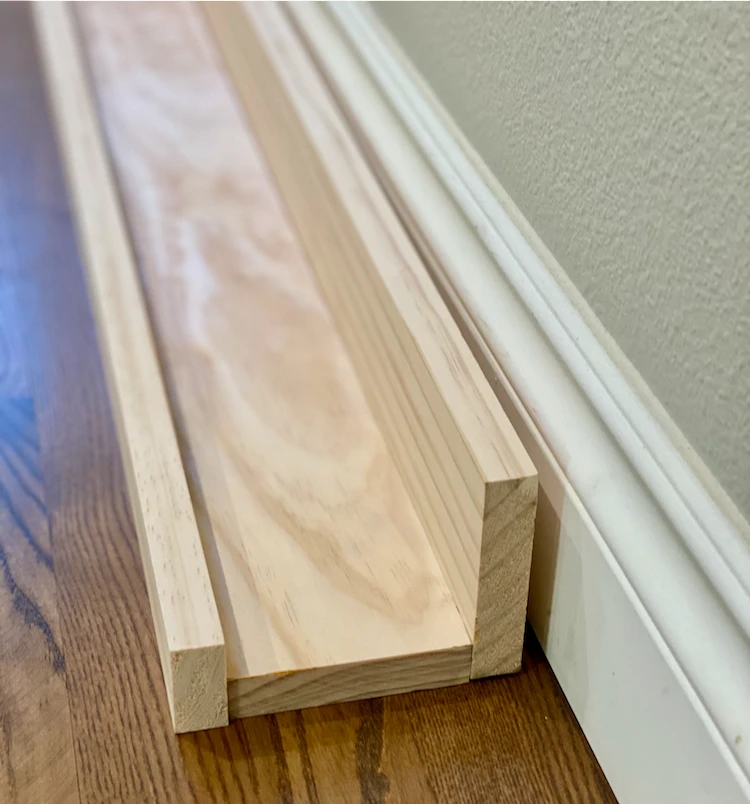
Here is how we made them. You can adjust the length of the shelves to whatever size you need. Most home improvement stores can cut the wood down to the size you need if you don’t have a table saw at home. We chose 8′ board length. We used select pine boards but you can use regular pine board too to make them even less expensive. You can download a printable copy of the DIY Picture Ledge instructions with diagrams or follow them right here.
DIY Picture Ledge Instructions
Three boards for each shelf you plan to make, cut to desired length of shelf (i.e. 4’, 6’, or 8’ long)
- Two 1” x 4” boards – BACK & BOTTOM board (A & B)
- One 1” x 2” board – FRONT LIP board (C)
- Wood glue (D)
- Eight countersink screws (E)
- Sandpaper
- Wood Putty (F)
- Stain
Tools Needed:
- Clamps that can accommodate a 6” gap (G)
- Drill & Countersink Drill Bit
- Screwdriver
- Brad or Finish Nailer (H)
- Paint brush or staining rags
Instructions:
Part 1
- Cut each of the 3 boards (A,B,C) to the same desired length.
- Apply wood glue to the back edge of board B and attach to the bottom front edge of board A.
- Use clamps to securely hold boards A & B in place.
- Use countersink drill bit to drill pilot holes on the “wall-side” of board A.
- Install countersink screws to securely attach board A to board B.
- Let glue dry before proceeding to Part II.
Part II
- Apply wood glue to the front edge of board B.
- Attach board C to board B and secure with clamps. **Note – Use scrap wood in between clamp and front side of Board C when securing clamps to protect board C from being damaged by clamps.
- Secure board C to Board B with a brad or finish nailer.
- Let glue dry before proceeding to Part III.
Part III
- Remove clamps and apply wood putty to cover brad nails on front of shelf. Let cure.
- Sand any rough edges to achieve a smooth finish.
- Stain sanded shelf to desired color.
*NOTE* When mounting Picture Ledge to wall, be sure to attach to studs to ensure it will support the weight.
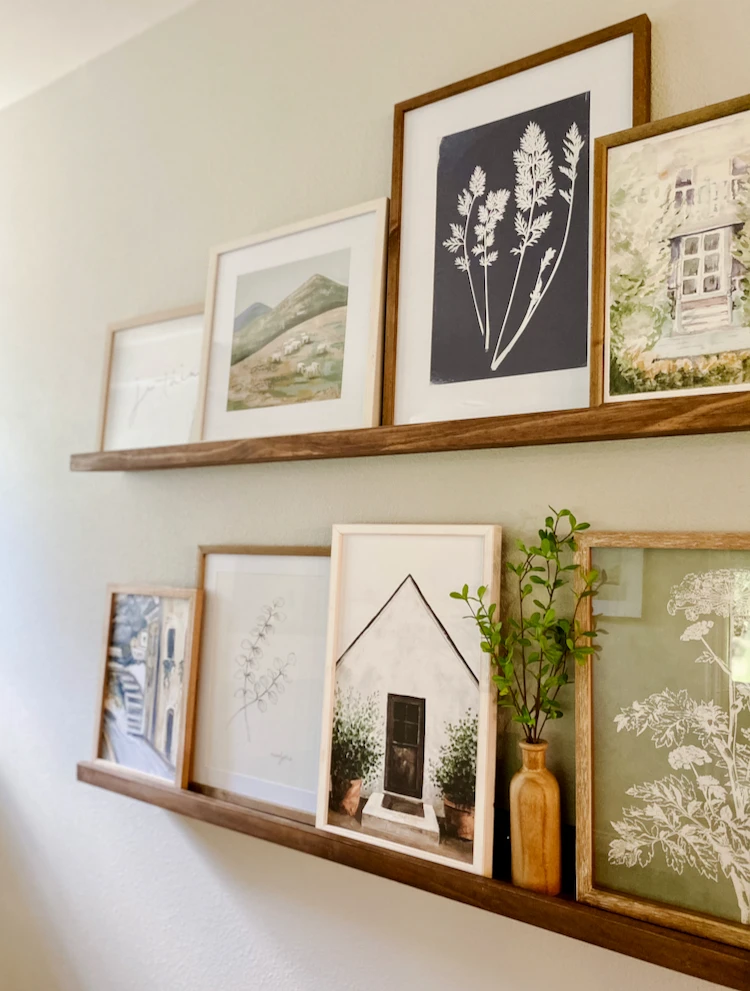
I used painters tape on my wall to use as a guide for where I wanted the shelves, it gave me a way to view it visually before attaching the shelves. The stain color I used on my boards was Minwax Special Walnut. Here are where the prints are from on each shelf (left to right). For items from Hobby Lobby I listed the item number so you can search it on their website. Also, when buying wall art from Hobby Lobby, never pay full price. Their wall art pretty much goes 50% off every other week.
Top Row:
Je Taime Framed Wall Art – Target
Going Places – Hobby Lobby (no longer available)
Navy Stems #1804327 – Hobby Lobby
Watercolor Garden Door #5413372 – Hobby Lobby
Vases – Amazon
Greenery in vases – Target
Hillside Village #1951797 – Hobby Lobby
Etsy printable in a 90% off frame from Hobby Lobby
Bottom Row:
Street Scene #5522784 – Hobby Lobby
Sketched Branch #1652155 – Hobby Lobby
White Home Wood #1798578 – Hobby Lobby
Wood Vase with greenery – Target (no longer available)
Sage floral print – Kirkland’s
Etsy printable in a 90% off frame from Hobby Lobby
Green Leaf Impression #1798529 – Hobby Lobby
Cest la Vie Framed Wall Art


