We may earn money or products from the companies mentioned in this post.
 I love how versatile the Cricut machines are, they come in handy for so many different craft projects. I was able to use my Cricut Maker to make these Faux Leather Keychains. I use my Cricut every month, but it’s get a lot of extra use just before the holidays. It comes in handy for making gifts, holiday decorations, cards and more.
Here is what you need to make your own Faux Leather Keychains using your Cricut machine. You can make these using The Cricut Air or the Cricut Maker. The Faux Leather is so thin you just use the regular blade to cut through the faux leather.
- Cricut Faux Leather (if you have the Cricut Maker, you can use real leather & the rotary blade)
- Cricut Iron On
- Images for you keychains
- Keychains
- E6000 glue
Once you have your shapes and images cut out, you are ready to make your key chains. If you are a new Cricut user I have detailed instructions on how to cut the shapes below.

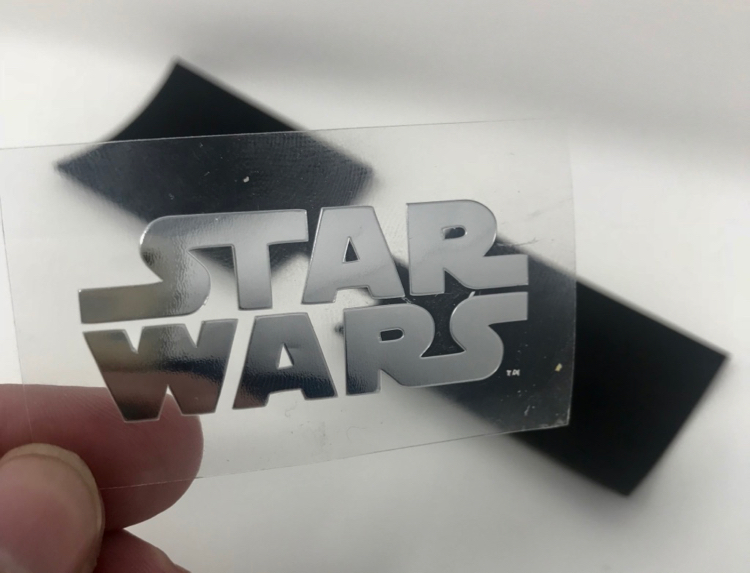
Use an iron or the Cricut Easy Press to adhere the iron-on image.

Make sure you slide the keychain on before you glue the two pieces together. Spread the glue on the back of one side of the key chain, you want to make sure you have a decent amount so it stays together and get it close enough to the sides that it won’t ooze out when you press the two sides together. If some glue comes out, just wipe it away quickly, it will be fine.
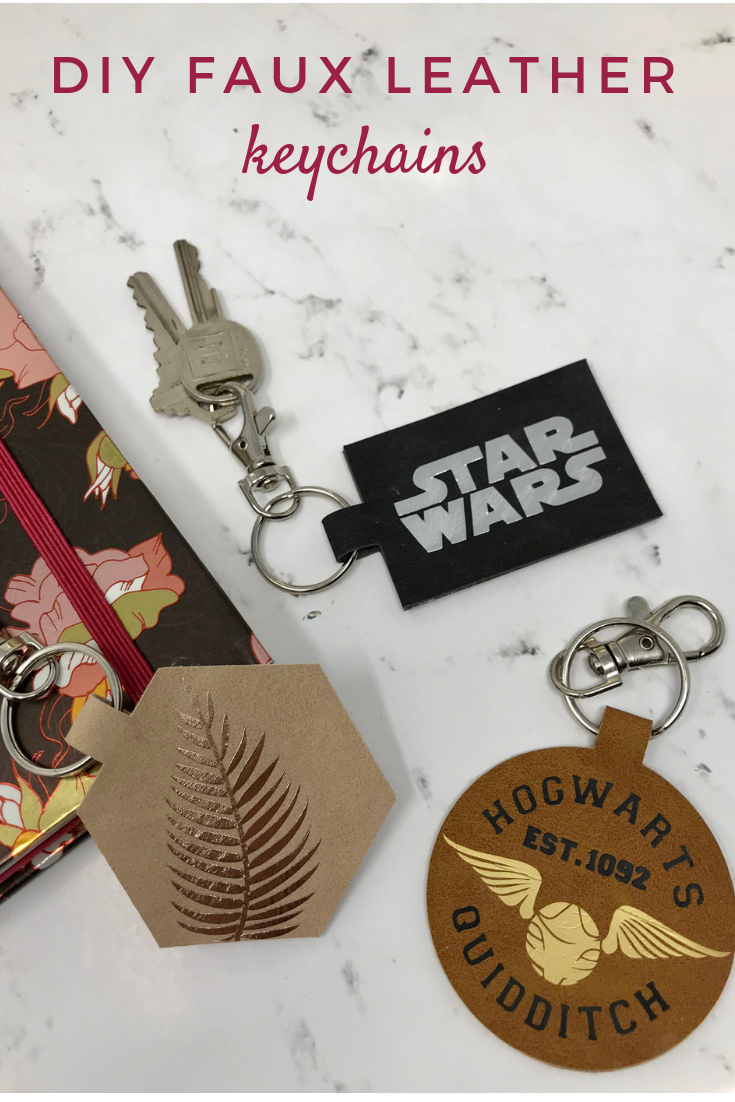
Here is a close-up look at the three different styles I made. The fern and Star Wars images were found in Cricut Design Space. The Harry Potter image was purchased via Etsy and it doesn’t appear that it’s still available. I am sure you can search Etsy for something similar.


Below you will find step-by-step instructions on how to make the shapes and cut the images via Cricut Design Space.

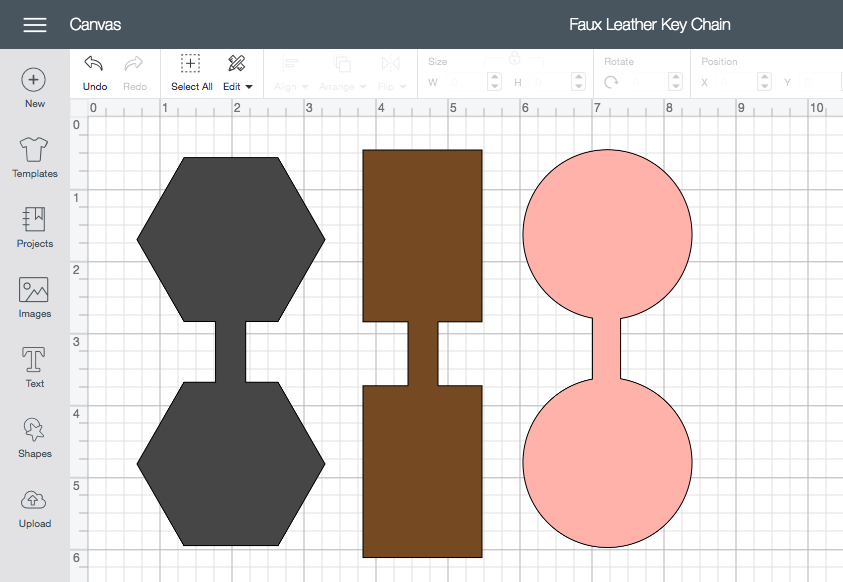
To make the key chain images I selected a shape in design space. If you want to modify a shape, click the unlock button and you can manipulate the shape. I used this to change the squares to a rectangle shape as you can see below.

Once I had the shape I wanted. I copied the shape so I had 2 identical shapes. Then I took a square shape and unlocked to create a rectangle to attach the two hexagon pieces together.

I moved the rectangle shape over to the hexagon shapes. To make this one shape instead of 3 individual shapes you will want to highlight all 3 pieces and the select the “weld” option at the lower right hand of Design Space.
I did the same process for the other key chain shapes I wanted.

I assigned each shape a different color since they were all going to be cut from different colored material. This helps Cricut know that you don’t want everything cut on one piece of material.
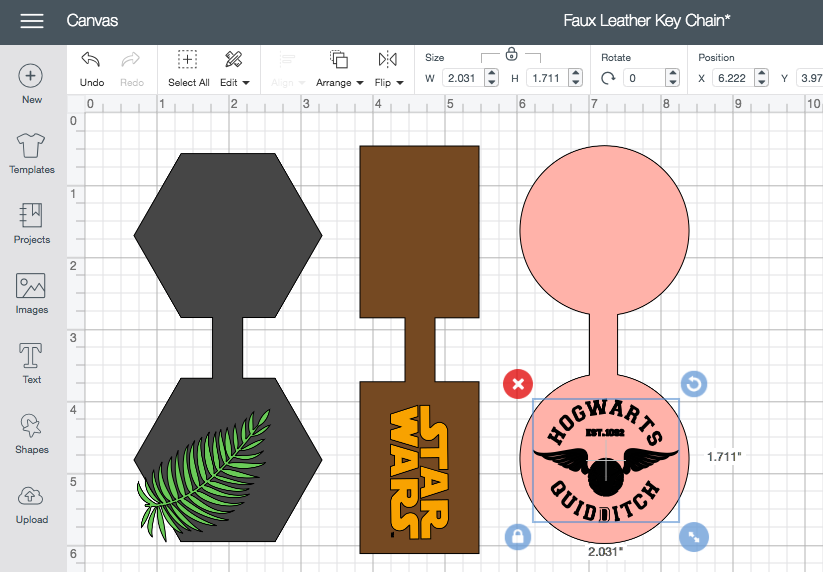
I inserted the images I wanted for each key chain and assigned them a color too. Now comes the fun part! The Cricut Maker cut all the images for me and I was able to assemble my project!


U are awesome!!!!
sewing-candy
Hi thanks so much for the awesome tutorial. How do you get the key fob
centered? I noticed mine wasn’t centered . It was off by half an inch.
anyway to align the images before welding?
What kind of glue did you use for this project?
I used e6000 glue.
Wow!!! I love your site and projects.
This is awesome!! Approximately what size did you make the templates for the keychains. I have no idea how big or small to make these
@Brenda If you look at the image that shows the shapes in the cricut program you can see how big I made them. They vary for each shape, but I generally made them about 2.5 inches.
thank you for posting these measurements, I had a hard time figuring them out with out on my own!
Hello!
Is this faux leather cut by the yard? Are these durable? How does the iron on hold?