We may earn money or products from the companies mentioned in this post.

Hello! I’m Kristy from Cup Of Jo! I love crafting, anything DIY and I’m a Pinterest Junkie!
I’m thrilled to be here at Thrifty & Thriving sharing a fun way to give money for a gift without it being the Oh so, predictable card!!
For starters you’ll need a little box that opens up from the top. I use Truvia for my coffee and this happens to work perfectly!!
Also…
- coordinating paper
- ribbon
- cupcake stamps
- ribbon to match
- paint color to match your paper
- little bead embellishments
- Glue
- Modge Podge
- Ink pad
- straw
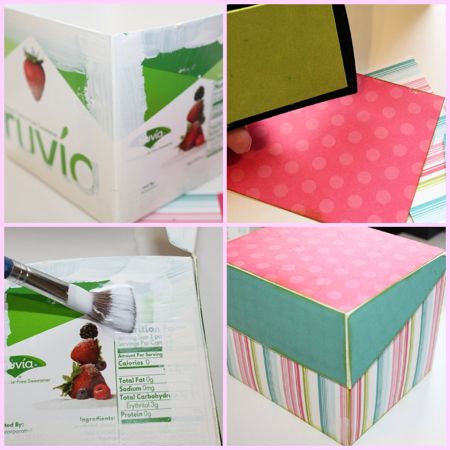
I painted all the edges where the box would show through. After that dried I placed the box on top of my paper and simply drew a line where I was to cut on the back side of the paper. {Then my little pencil marks wouldn’t show!} When all the pieces were cut to size, I inked all the edges! Then I busted out my handy dandy modge podge and spread it on to glue down all my paper pieces.
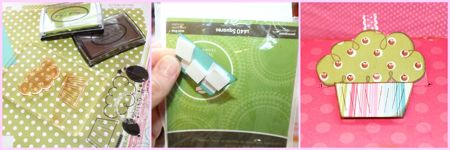
I found this great little birthday stamp set at the last craft expo that I’d attended and FINALLY ripped it open for this project! {My hubby would say it’s because I have TOO much stuff! I’d say, I was waiting for the perfect project!}
Anyhoo, I stamped out the base on one paper and the top on another. I added little bubble bead embellishments and a little pull ribbon at the top. You could decorate however your little heart desires though! I used foam pop-up dots to lift the base of the cupcake up enough for the top of the cupcake to hide behind it. That way you don’t see the money at all!

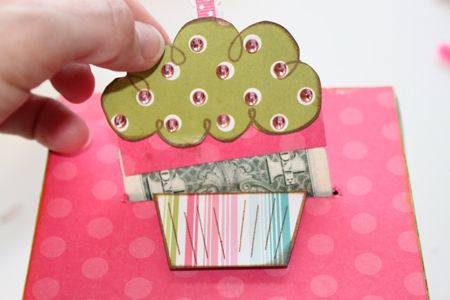
To see how long the slit in the top should be I simply measured using money! I used my lil’ exacto knife and made aprx. a 3mm wide slit in the top. Make sure it’s a smooth slit, so the money doesn’t get stuck to it at all!

You’ll take however much money you want to give {in ones!} and tape them together from end to end. MAKE SURE the tape goes from one side to the other and that will ensure a nice glide out of the box top! Tape the final end of the money to your straw.
Your straw should be cut to fit SNUG from one side of the box to the other without pushing the box sides outward! I used glue to secure it on both sides as well!
You’ll feed the beginning of the money through the slit in the top and tape it to your cupcake top, like so…
I did one of these for my teenage nephew and he loved it!! I always give him $50 bucks, so it trailed across the living room! You can see his HERE!
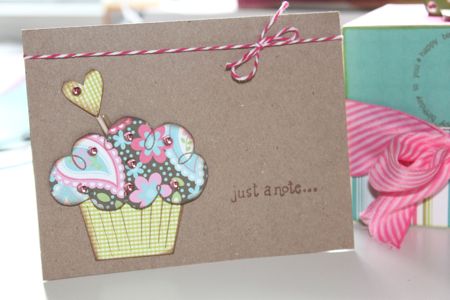
Since I already had everything out to stamp the cupcakes, I made several extras…One for the birthday card and several for future use! With “just a note” stamped on it, they can be used for any occasion!

The ideas and colors for this little box are endless! It can be decorated as much or as little as you like!! I put a big pink ribbon on the front to finish it off and I didn’t want you to be able to see that the box opened!
On the next one I add a little bunting banner!
My next visit I will be sharing cake batter cookies that are so simple, but crazy good!!
I am pleased to have Kristy contributing here at Thrifty and Thriving. Kristy is a Pinterest junkie, she loves crafting and anything DIY. You can view more of her fun projects over at Cup of Jo!


